


After lot of distro hopping and using various DEs (desktop environments), I finally wanted to experience minimal and stable OS with some powerful and customizable window manager. I could have used minimal Arch ISO but being a rolling release it doesn't check the stable OS mark. So I decided to give a shot to Ubuntu (famous celebrity in linux distros)
This is a step by step guide to install ubuntu (without any bloat) with awesome window manager.
First Step
So this is pretty straight-forward step where you need to download the ISO from official ubuntu website. But the catch here is, we'll be downloading Ubuntu Server Instead of Ubuntu Desktop. The reason being, we want minimal OS with no bloat in it !

Boot into the OS
Once downloaded, use any software of your choice to write the ISO in pendrive to make it bootable (personally I like usbimager). After that, reboot the system with the drive plugged in it.
Note : You might want to create partition using partition manager or command line before rebooting the system if you want to install ubuntu in some particular partition on the drive.
Now, using your system-specific shortcut (generally it's F2 or F12 key), boot into BIOS Boot menu and select the bootable device.
Install Minimal Ubuntu
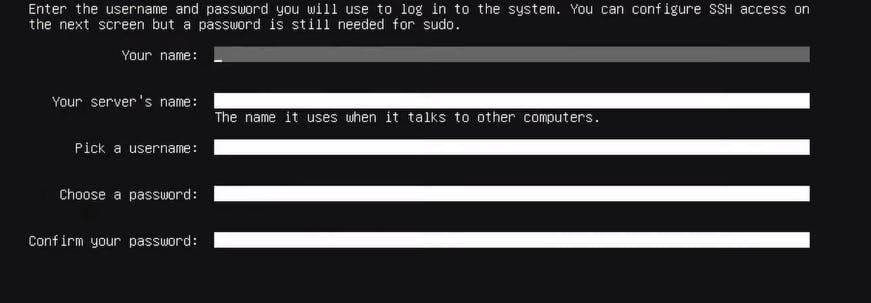
This step consists of multiple steps where you would require to choose Language, Keyboard layout, partition in which you want to install ubuntu etc.
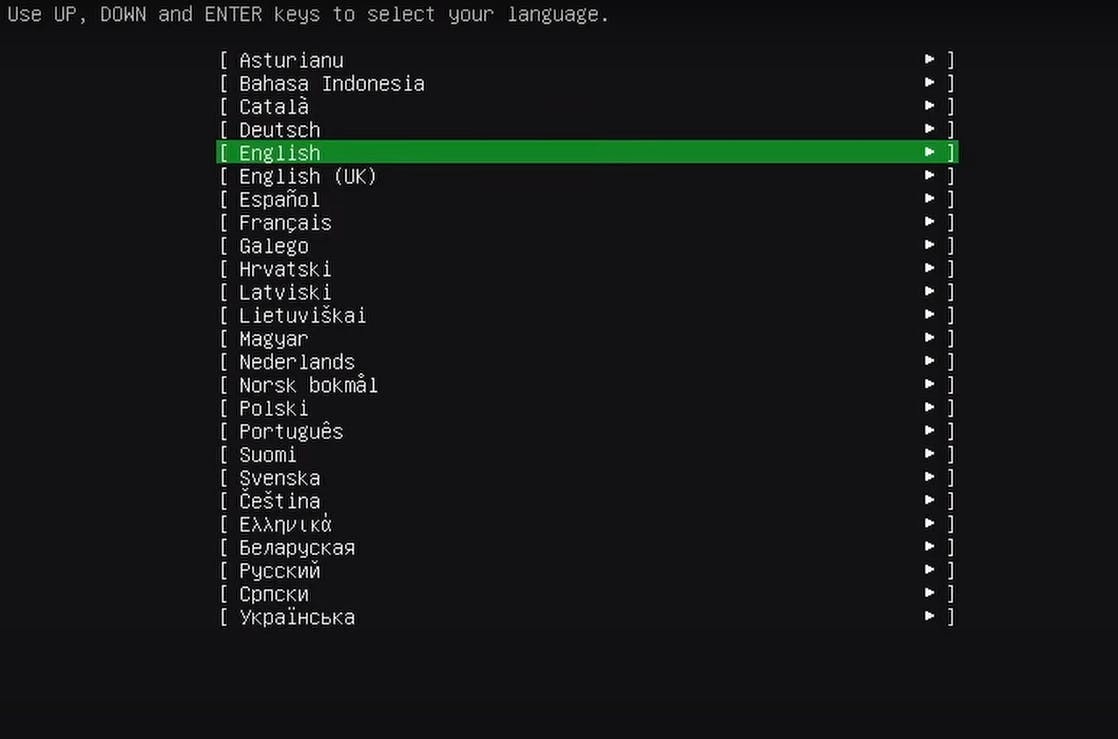
Let's go through each step one by one. First you need to select your language.
Then select your keyboard layout. Mine is English (US). If you're not sure, then you can select Identify keyboard and ubuntu will automatically detect it for you.

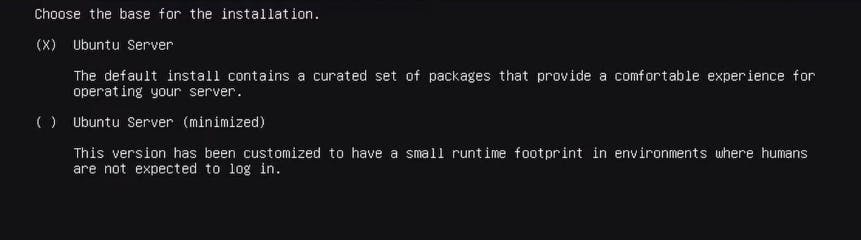
In this step, choose the default version which is Ubuntu Server (as this is already very minimal).
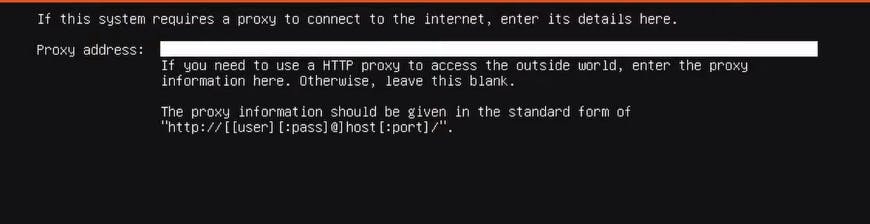
Now select your network and hit Done. If you're using any proxy then enter the details at this step. If not, then hit Done.
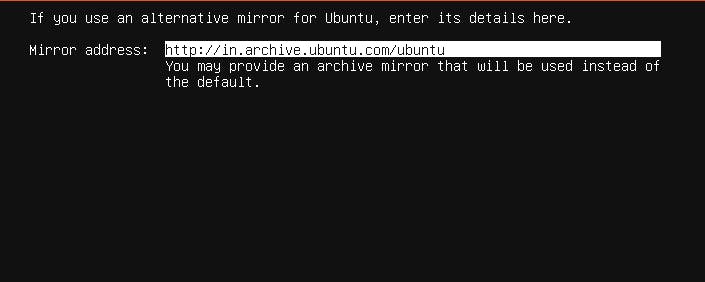
In this step, you need to provide closest mirror from which ubuntu will download the necessary packages. If you are not sure which mirror to enter, you can go ahead with default mirror.
Be carefully selecting the partition at this step, as this will erase the partition completely so make sure you backup everything before you proceed.

Next screen will show the final summary of partitions that ubuntu going to use. Make sure to double check everything here before you hit Done. Now ubuntu will ask you to enter few details and create a new user for you which you can use to login.
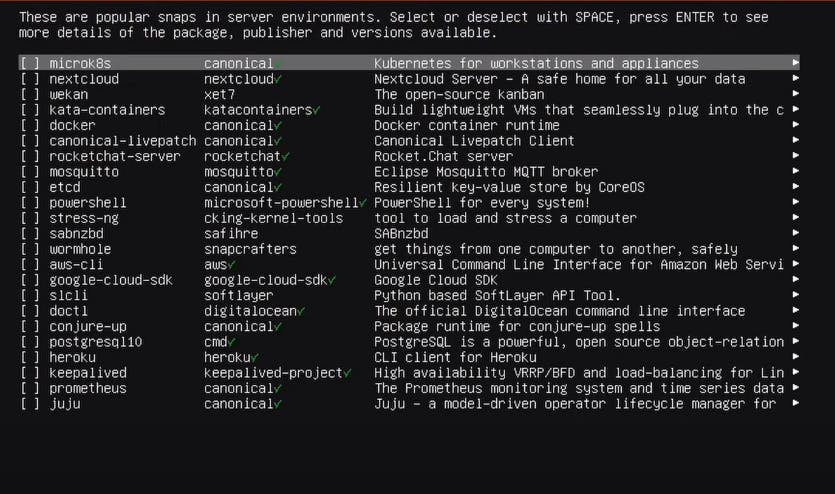
At this screen, you can install listed packages if you want. But I would advice to leave all of these uncheck if you're not sure. You can always install these packages later if you ever want. Now press Done and ubuntu will start installing.
Once done, hit reboot and unplug the pendrive.
Now if you boot into the installed OS, you would see TTY login screen shown below.
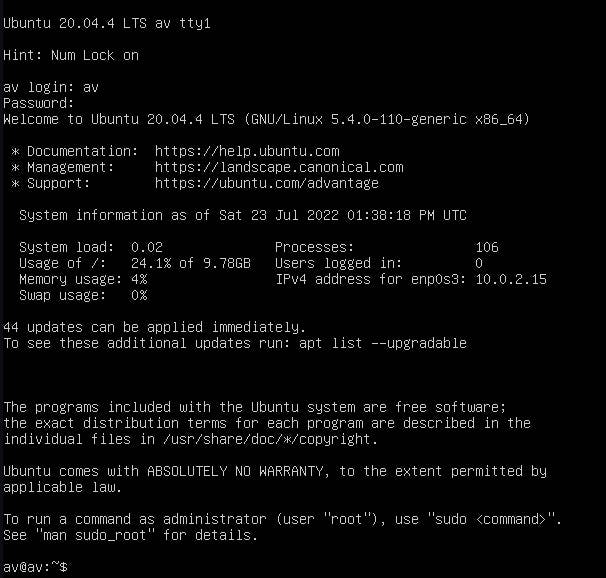
Login with correct user name and password.
Congratulations ! You've succesfully installed Minimal ubuntu. 🎉
Info : If you run
apt list --installed | wc -lcommand, it'll print out one number which denotes installed packages on your system (list of packages varies based on hardware). For me its591which is quite low.
Install Awesome WM
Now, it's time to install Awesome WM with other necessary packages. To install copy-paste below command into terminal.
# update system packages
sudo apt update && sudo apt upgrade

# install awesome
sudo apt install awesome

# install other necessary packages
sudo apt install neovim firefox terminator xorg
Boot into Awesome on Start
Once all the packages are installed, type reboot and hit enter.
You'll see that after reboot, it'll again present you with TTY login screen. Once you enter username and password it should ideally log us into Awesome WM but it won't ! Because It doesn't know which DE (Desktop environment) or WM (Window Manager) we're using.
Info : Being a minimalist I like
TTYlogin screen but if you're not big fan of terminal based, then you might want to install some sort of display manager (maybelightdm)
To let ubuntu know, we need to do some extra configurations.
First create a file .xinitrc in your home director which is a shell script containing all the configs we need for (GUI) X-services.
echo "exec awesome" > ~/.xinitrc
Now, we need to startx automatically so we don't need to manually type everytime we login.
Note: If you are using zsh, then add this into your
.zprofile
echo "startx" >> ~/.bash_profile
and reboot again using reboot command. Now if you login again, Ubuntu will open Awesome WM automatically !
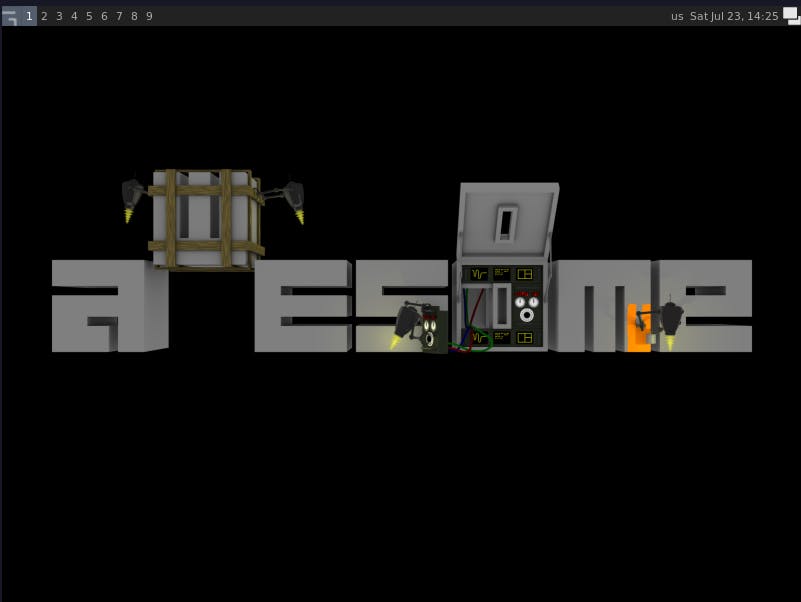
Well Done ! Next step is to configure awesome as per your liking and making it your wm. 🎉
I hope you find this article interesting. Thanks for reading. Until then, bye 👋